
When watching the February 2019 update video and learning about the new Filter Pane experience (in preview). I learned about another feature, which had gone again unnoticed by me.
I am trying to keep on top of new features, but it is a daunting challenge. Anyhow when I first heard about the “Slicer Pane”, I went hunting under visualizations, options, properties for a slicer on how to make a pane out of this. With no luck, I was getting frustrated. Where was this functionality, because it was annoying so much of my page space was stolen by slicers. To get around this, I created a page for slicers, and relied on slice syncing. Which was good, expect when slicers didn’t update as expected under sync scenario. Then like any good IT geek, I took to Bing! (Yaah! I use Bing!) and found video Guy in Cube).
So learning about slicer pane was cool. What made it more cool was it was not a new feature, rather it was creative way to use bookmarks.
High-level approach:
- Build slicers you need for the report page.
- Build a button to show slicers.
- Build a button to hide slicers.
- Build a bookmark where slicers + hide slices button is visible but show slicers button is hidden.
- Build another bookmark where show slicer is visible but slicers + hide slicer button is hidden.
You can make this a bit more fancy by booking box around it, but it is just steps above. Let’s walk through an example.
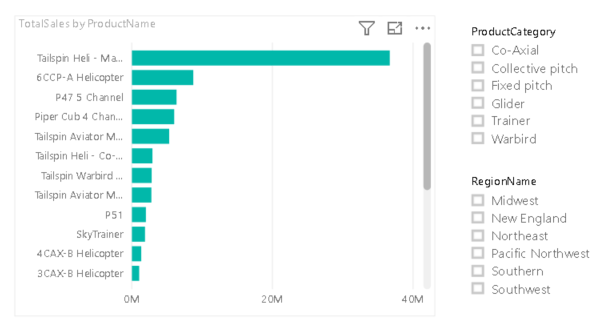
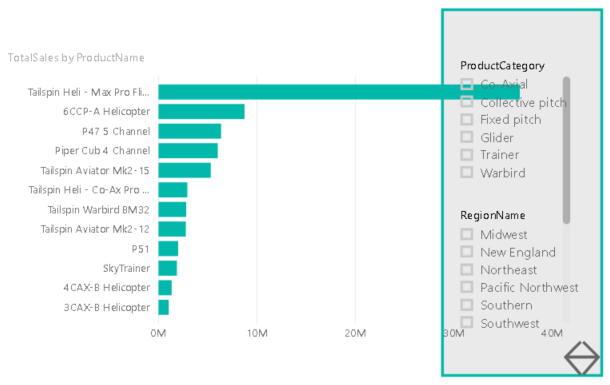
I have a simple report with graph showing sales by product. It has two slicers by product category and region name. I want to change the slicers into a slicer pane to allow for bigger graph view.

So first, I’ll create a box around my slicers and grow my graph. So slicers and box over lap with graph. Then I’ll make sure the view order is correct (under Format for visual, or by using the selection pane). So when slicer/box is visible they on top of the graph.
Next I add couple of buttons (I chose right/left arrows). One button will be used to hide the slicers and another to show them.
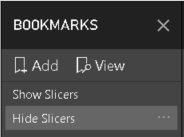
Next we are going to create couple of bookmarks, name them “Show slicers” and “Hide slicers”. Right now they are just place holders, we will update them later.
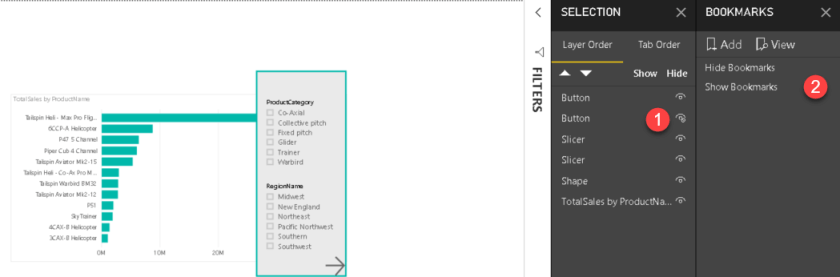
Now we’ll open the Selection Pane and hide the left arrow button and update the Show Bookmarks.
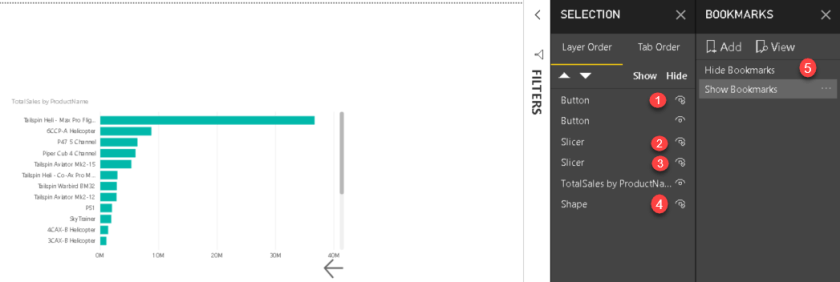
Next we’ll hide the right arrow button, slicers, and the box and update the Hide Bookmarks. We are have the main work done, now we just need to program the action for each button and we have a slicer pane that can show up on demand.
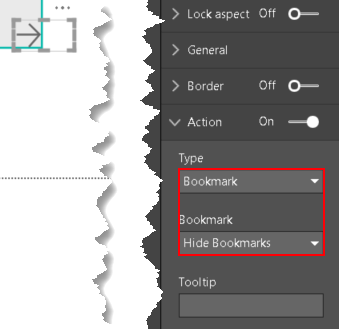
While having the right arrow selected, update the action property. To bookmark, and set the bookmark to “Hide bookmark”.
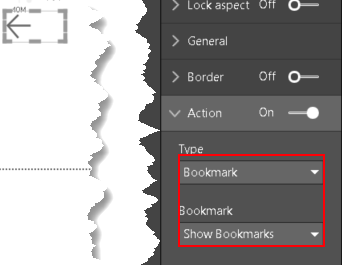
Next select having the left arrow selected, update the action property again. This time set it to “Show Bookmarks”. Now you can test the behavior out in Power BI Desktop by CTRL+Left Clicking arrow to making sure it works as intended.
So this was cool learning for me :). Here’s to more Power BI learning!
PS With this post I am caught up for my promise of one post/month :). Now the next challenge not to fall behind again.
